




Cleaning a PCB after soldering is not simply a matter of making the board look tidy. The goal is to remove unwanted flux residue, solder debris, fingerprints, and cleaning-fluid residue without driving contamination under components, damaging materials, or trapping liquid in the assembly. The right process depends on the flux, the assembly, and the reliability requirement. A hobby board and a controlled production assembly should not be treated as if they have the same cleaning process.
Do You Need to Clean a PCB After Soldering?
Not every soldered board needs the same level of cleaning. Some no-clean fluxes are designed to leave a low level of residue under a defined process, while water-soluble and many rosin-based residues may require removal for the product’s appearance, downstream coating process, inspection needs, or reliability plan. Do not decide from the name alone: contamination, board geometry, component standoff, and the manufacturer’s documented process all matter.
Clean the board when you see residue that interferes with inspection or coating, when the assembly procedure requires it, when water-soluble flux has been used, or when you need to remove visible debris after rework. If the flux type is unknown, treat that as a decision point rather than guessing. Check the flux label, work order, assembly documentation, or process owner before selecting a cleaner.
This article addresses cleaning after soldering. If the issue is oxidation, dust, or fingerprints before a joint is made, see how to clean a PCB before soldering.
Identify the Flux Residue Before Choosing a Cleaner
Start with records, not appearance. Residue color, tackiness, and location can be useful clues, but they do not reliably identify chemistry. Look for the flux product name, solder-wire documentation, paste label, or the shop’s assembly instructions. If you cannot confirm the material, make a small compatibility check on a noncritical area or ask the process owner; do not flood the whole board with a solvent because it is commonly recommended online.
| Residue or situation | Starting decision path | Important limit |
|---|---|---|
| Rosin or RMA residue confirmed | Use a cleaner documented as compatible with that flux and the assembly; apply it in a controlled amount and lift residue to fresh absorbent material. | Confirm compatibility with markings, plastics, adhesives, coatings, and connectors. |
| Water-soluble flux confirmed | Follow the documented wash or manual-cleaning process; make drying and trapped-liquid control part of the process. | Water exposure is not automatically safe for every assembled board. |
| No-clean residue confirmed | First confirm whether removal is required by the product or process. If it is, use a validated method rather than assuming it will dissolve like another flux. | No-clean does not mean every residue is harmless in every use case. |
| Unknown residue or mixed rework residue | Pause, identify the materials, and use a controlled compatibility test or an approved process. | Do not infer chemistry from visual appearance alone. |
For a broader overview of contamination and board-cleaning options, read PCBtry’s guide to cleaning a PCB. The rest of this guide narrows the task to flux and post-solder residue.
What You Need for Safe Post-Solder PCB Cleaning
Prepare the workstation before opening a cleaner. You need a stable, unpowered board; adequate ventilation; eye protection appropriate to the product’s safety information; lint-free wipes or swabs; a brush suitable for electronics work; a way to apply the approved cleaner in a controlled quantity; and clean compressed air or other approved drying equipment where appropriate. Avoid cotton material that sheds fibers and reuse neither wipes nor swabs once they are loaded with residue.
Read the cleaning product’s technical and safety information. A cleaner may be effective on flux but incompatible with a label, plastic, elastomer, adhesive, conformal coating, or connector component. Do not clean powered equipment. Remove batteries or disconnect power sources, allow the assembly to cool, and discharge stored energy according to the equipment’s safe-work procedure.
Choose the Cleaning Method by Flux Type
Use the table above as a starting point, not a universal solvent chart. The method should match both the residue and the assembly. For a small bench-cleaning job, the basic pattern is controlled application, gentle agitation when needed, transfer of dissolved residue to a fresh wipe, complete drying, and inspection. For larger volumes or high-reliability products, the process may need documented chemistry, wash parameters, rinse quality, drying settings, and verification by the responsible engineering team.
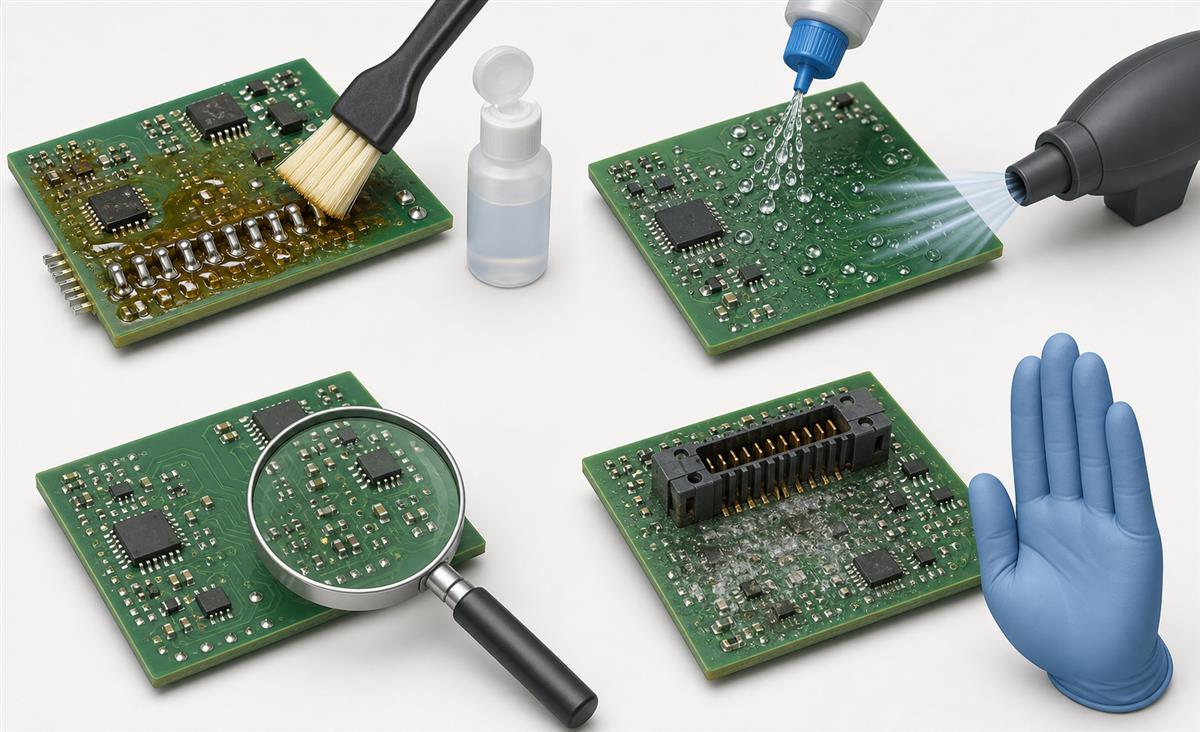
Do not spray large amounts of liquid under bottom-terminated packages, connectors, switches, shields, or other places where fluid can remain hidden. Low-standoff geometry makes cleaning and drying harder. If residue is under a component and you cannot clean and inspect it without forcing fluid into the assembly, stop and evaluate the process rather than escalating brush force or solvent volume.
How to Clean a PCB After Soldering: Step by Step
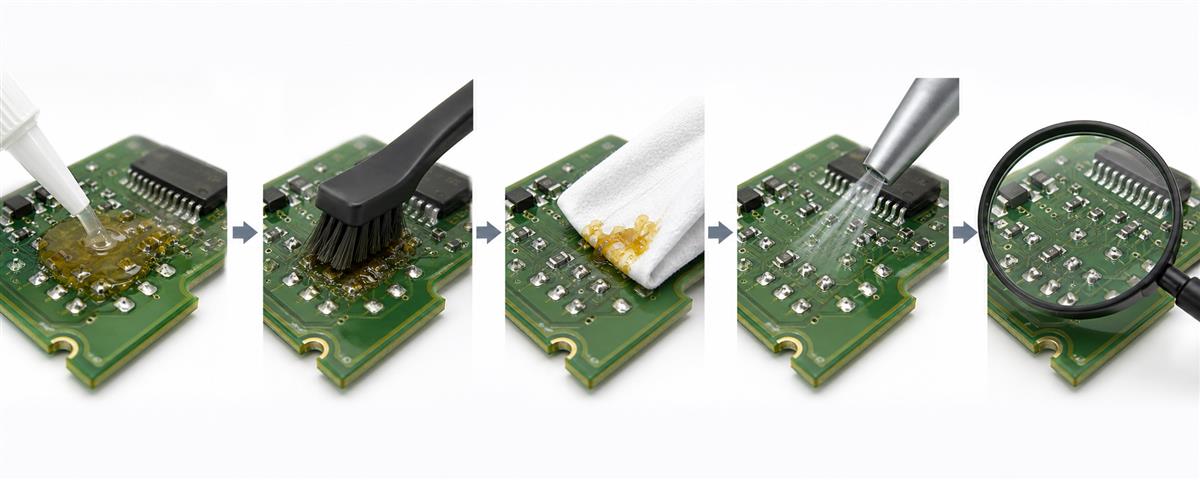
- Record the starting condition. Note the flux type if known, the areas to be cleaned, visible solder balls, and any coating, labels, damaged pads, or sensitive parts.
- Secure and de-energize the assembly. Work on an ESD-conscious bench as appropriate for the product. Do not start while the board is hot or powered.
- Remove loose debris first. Use a clean, appropriate brush or controlled air to remove loose solder fragments and dust. Do not blow debris deeper into connectors or under components.
- Apply the approved cleaner in a small, controlled amount. Wet the cleaning tool or target area only as the product instructions allow. The aim is to mobilize residue, not soak the assembly.
- Agitate gently where residue is present. Use light strokes. Hard scrubbing can damage markings, disturb small parts, or push residue into tight spaces.
- Lift residue away with a fresh wipe or swab. Move from the cleaner area toward clean absorbent material. Replace the wipe or swab as soon as it is visibly contaminated. Reusing a loaded wipe redistributes residue.
- Repeat only as needed. Inspect between passes. If the residue does not respond as expected, do not keep adding liquid; verify the flux and cleaner compatibility.
- Use a compatible rinse only when the documented process calls for it. For water-soluble processes especially, incomplete rinsing or drying can create a new problem.
- Dry the board completely. Give attention to connectors, vias, shields, low-clearance components, and other fluid traps. Do not power the assembly until drying is complete under the applicable procedure.
- Inspect before return to service. Check for visible residue, white film, fibers, solder debris, pooled fluid, damaged markings, and signs that cleaner has entered an unsuitable area.
For repair or rework where the solder joint itself needs attention, use the appropriate joint method as well; PCBtry’s guide to soldering to a PCB covers the soldering side of that work.
Why Process Validation Matters for Post-Solder Cleaning
Cleaning performance is process-specific. Public IPC technical material on cleaning-agent selection and no-clean lead-free flux residues discusses how residue chemistry, component geometry, cleaning chemistry, and process conditions influence results. Those publications are useful because they show why a successful wipe test on one board is not proof that the same method will clean every assembly or reliability class.
Published engineering scenario: IPC misprinted-PCB cleaning experiment
Problem: Public IPC material on cleaning-agent selection describes a designed experiment using single- and double-sided PCB test vehicles with wet paste, adhesive, reflowed residues, and multiple chemistry sets before downstream soldering work. The issue was not whether one solvent looked clean on one surface, but how residue, finish, equipment, chemistry, and delay affected cleaning results.
Treatment: The published experiment varied cleaning delay, chemistry, and process conditions. It inspected fixed locations at 40x and measured ionic residue while checking OSP and immersion-silver finishes. This is a specific evaluated process, not an instruction to reproduce the experiment on an arbitrary board.
Result boundary: The paper reported a best-performing process for its tested residues and equipment while stating that optimal results depend on residues, equipment, and chemistry. The reader takeaway is to classify contamination and surface finish, preserve evidence, and validate a process on representative boards instead of treating one solvent recipe as universal.
When to Stop: Components, Coatings and Damage Risks
Stop and verify the process if the board is powered; if the material is unknown; if you see conformal coating, an adhesive, labels, foam, a membrane switch, a battery, or a part that could trap fluid; or if cleaning would require flooding a low-clearance component. Also stop when corrosion, lifted pads, damaged solder mask, or cracked components are present. Cleaning cannot repair mechanical or electrical damage, and excess solvent can make diagnosis harder.
Long-term reliability also depends on material and environment choices after assembly. For context on keeping a board serviceable over time, see PCB durability over time.
How to Inspect a PCB After Cleaning
Use magnification and good lighting. Inspect the original residue areas, component edges, connector openings, and any area that received cleaner. Look for glossy or sticky residue, white deposits, fibers, solder balls, streaks that show residue was spread rather than removed, pooled liquid, damaged legends, and discoloration. If your product has an approved electrical test or cleanliness verification step, use that documented step; a visual check alone does not replace it.
Post-Solder PCB Cleaning Checklist
This is a general work aid, not a production qualification record. Mark each point only when it has been checked for the specific assembly.
- Power removed and board cooled.
- Flux or residue type confirmed, or an unknown-material escalation chosen.
- Cleaner and assembly compatibility checked.
- Ventilation and product safety instructions reviewed.
- Loose solder debris removed without driving it into the board.
- Cleaner applied in a controlled quantity.
- Residue lifted to fresh absorbent material, not spread with a used wipe.
- Low-clearance parts and connectors checked for trapped liquid.
- Board dried completely by the applicable process.
- Residue, film, fibers, solder balls, and pooled cleaner inspected under good light.
- Markings, coatings, pads, and components checked for cleaning damage.
- Approved electrical or process verification completed when required.
FAQs About Cleaning a PCB After Soldering
Can I use isopropyl alcohol to clean a PCB after soldering?
It may be suitable for some flux residues and assemblies, but do not treat it as universal. Confirm the flux, concentration, product instructions, and compatibility with the specific board materials and parts.
Do I need to remove no-clean flux after soldering?
Not automatically. Confirm the flux documentation and the product’s cleanliness, coating, inspection, and reliability requirements. Remove it only with a compatible, validated approach when removal is required.
What is the safest way to clean flux from a PCB?
Identify the flux, use a compatible cleaner in a controlled amount, transfer residue to fresh absorbent material, dry fully, and inspect. The safest method changes when materials or assembly geometry change.
Can I wash a PCB with water after soldering?
Only when the documented flux and assembly process support it. Water-based cleaning also needs suitable rinse quality and complete drying; it is not appropriate for every finished assembly.
Why does a PCB look white after cleaning?
A white film can be residual flux, cleaner residue, mineral contamination, or a material reaction. Do not assume the cause from appearance; review the cleaner, process, and board materials before repeating the step.
How do I avoid spreading flux residue while cleaning?
Use small amounts of cleaner, work toward fresh absorbent material, and replace wipes or swabs once they are contaminated. Inspect between passes instead of repeatedly rubbing the same area.
How long should a PCB dry after cleaning?
There is no reliable universal time. Drying depends on cleaner, amount used, ventilation, temperature, geometry, and whether liquid is trapped. Follow the applicable product or process instruction and inspect likely fluid traps.
Can I clean under an IC package after soldering?
Only if the process is designed for that geometry and you can confirm cleaning and drying effectiveness. Do not force liquid beneath a low-standoff package just because residue is visible nearby.
Should I clean a PCB after hand soldering?
Hand-soldered work often benefits from removing visible flux and debris, but the decision should still follow the flux type, assembly materials, and intended use.
Can I power a PCB immediately after cleaning?
No. Do not power it until the board is completely dry and any required inspection or approved verification step is complete.
Need PCB Manufacturing Guidance?
Need a PCB built around your assembly and inspection requirements? Share the board material, finish, operating environment, and cleaning-process requirements with PCBtry before production. The right manufacturing discussion starts with the actual assembly and verification needs, not a generic cleaning promise.
Sources
- IPC technical material on cleaning-agent selection (public conference material; source for the misprinted-PCB cleaning experiment described above).
- IPC technical material on contaminated no-clean assemblies (public technical material; reliability context).
- IPC material on no-clean flux and cleaning considerations (public technical material).
- MicroCare manual solder-flux cleaning guide (manufacturer guidance; use with product compatibility information).



0 Comments